Hi Stampers,
Here is a look at this weeks DOstamper Thursday DSC#180 Color My World Challenge! I am always inspired by different types of card folding techniques, so this week's card was a fun challenge for me. A few months back, Dawn Olchefske had posted a Fold Back Card which inspired me to make my take on that fold for this week's card. This is my Folded Pocket Gift Card. I wanted to use up my Field of FLowers DSP so can can make room for the new papers coming out soon. I was low on a few of the suggested challenge colors, but was able to substitute colors that are very close in color and still stay within the spirit of the combo challenge.
As you can see in the photo below, you can use the little hidden inside folded area to stuff with a Gift Card or Dollar Bills if you choose.
The finishing touch was to add the little pearl gem.
The finishing touch was to add the little pearl gem.
CLICK HERE to view video!
Basic Directions:
1.
Cut card base @ 5”-1/2” x 8-1/2” using Lost
Lagoon CS. Score @ 4-1/4" for top fold of card.
2.
On front of card score top flap on
bottom @ 2-3/4" on the ANGLED Score
Board, flip to the other side of the front of the card and score again @ 2-3/4".
3.
Cut Striped Paper from the Wildflower Fields DSP @ 2-3/4” x
5-1/4”. making sure to cut the
stripes in the correct "up & down" direction.
4.
Cut Wildflower FIelds DSP square @ 2-1/2” x 2-1/2” and then cut in starting on the point and working
down until paper is cut in half forming two diamond shaped papers.
5. Cut Whisper White rectangle @ 1-1/2”
x 5-1/4” and attach to the top of the card.
2.
Stamp the Happy Birthday image onto
the Whisper White card stock using
the Stamp-a-ma-jig and the Memento Black Inkpad and the Perfectly Penned Stamp Set.
3.
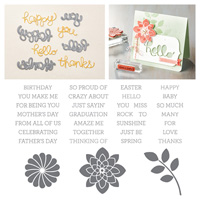
The “Flower” is stamped using the Crazy
About You stamp set and Hello Honey
Ink and punched out with the Flower Medallion Punch.
4.
The leaves are punch with SCRAP from Old Olive CS and leaf punch
5.
Attach the front flaps using Tear Tape on underside of the front of
the card.
6.
Attach the flower to the card front using Dimensionals
securing the two sides together. Attach
the large Pearl Gem to the center of the flower. Stick the leaves behind the flower using glue
dots.
7. Cut Envelope CS 8" x 8" and punch and score @ 3-1/2". Cut Sweet Dreams DSP @4” x 4” for Envelope Liner 4" x 4", punch @ 3-7/8"
7. Cut Envelope CS 8" x 8" and punch and score @ 3-1/2". Cut Sweet Dreams DSP @4” x 4” for Envelope Liner 4" x 4", punch @ 3-7/8"
Product List
Check out the other DOstamper STARS by clicking on each of the links below:
If you would like to automatically get my blog posts by email all you have to do is enter your email address in the upper right hand corner of my blog where it says "follow me by email" then you'll never miss a a card or project again.
You can purchase supplies for this card and all my projects on my online Stampin' Up! Website by clicking the Shop 24/7 link below.


I like that you included a place for dollar bills :o) Very nice
ReplyDeleteThank you so much for taking time to comment.
DeleteYour pocket card turned out great Sharon! Thanks for playing along for this week's DOstamperSTARS Thursday Challenge!
ReplyDeleteThank you Dawn...Love this card fold.
Deletevery cute, what punch is the flower punch, old one ? mary
ReplyDeleteMary,
DeleteSorry, The punch is the Flower Medallion Punch #137417 and it is still available.
I really like this card. Very well done!!
ReplyDeleteThank you very much Cathy!
DeleteLoved the pocket card. Would you do a video soon?
ReplyDeleteHi Shirley, Thank you for your comment. And...yes, I was just thinking yesterday since I have been getting constant emails on this card that I will have to make a video for this card. I will try to see if I can get one together this weekend.
Delete